raise beds can be a great way to add up social structure and order to your garden that often seems permanent . However , if you involve to hit them , there is a way to do it . We ’ve done the research and are sharing a step - by - footfall guide to quickly and easily removing elevate layer from a garden . So , rent ’s get started !
To remove a raised bed from a garden , take these steps :
Removing a rear layer is a dim-witted task to accomplish , but it requires some attention and aid to detail . So , to make certain you are wholly gear up , we ’ve prepare an in - depth guide for you . Keep reading and you ’ll learn everything you ask to make love about removing a grow seam from a garden .
![A rustic vegetable and flower garden with raised beds. How To Remove Raised Beds From A Garden [Step-By-Step Guide]](https://i2.wp.com/gardentabs.com/wp-content/uploads/2022/11/How-To-Remove-Raised-Beds-From-A-Garden-Step-By-Step-Guide.jpg)
Removing Raised Beds From Garden
So you do n’t face any interruptions as you remove your farm bottom , make indisputable you have everything you ’ll need before begin .
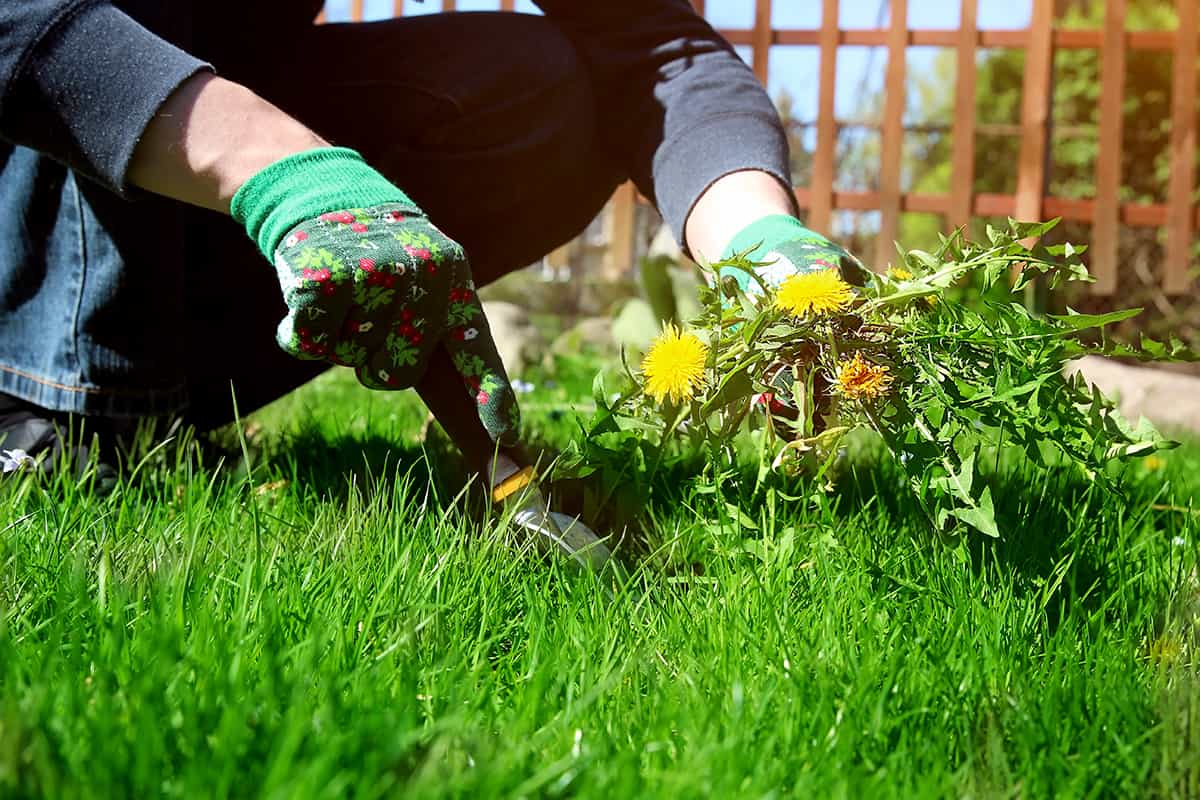
1. Remove The Weeds And Other Plants
The first step is removing any plants presently growing in the raised layer . Depending on how long the seam has been unused , you might find flowers , gage , herbaceous plant , or weeds growing there . Each one require a somewhat different remotion approach path , which we ’ll explain here .
If the raise bed was used recently , there might still be perennial growing there that you ’d care to keep or give aside to a gardener Quaker .
To remove the plants , cautiously dig around the plants and avert nicking the origin with your shovel . ensure to leave some dirt around the roots as well . Smaller plants can be planted in a container until you ’re ready to replant them , or wrap gunny around the roots of orotund ones .
Your promote bottom might be full of grass if it ’s been there for a long time . However , you’re able to remove it easily by cutting it into strips and untie the beginning from the dirt with a shovel or coon . roll up up each objet d’art to remove , and either utilise them to re - turf function of your G or toss them in the compost .
If the raised bed has been abandoned for a long time , it ’s likely full of locoweed . To remove them without chemical substance , start by using a pitchfork to loose the dirt . Pull out as many weed as you may , and then use the shovel to turn over the dirt and remove deeper root .
2. Remove the Dirt
After all the plants are gone , it ’s time to remove the shite . pop out by using your pitchfork or a hoe to loosen the dirt so it can be remove more easily . Then , using your shovel , scoop out the dirt from the raised bottom into a wheelbarrow or tarpaulin .
you could dispose of the malicious gossip in a few different shipway . If it ’s still in good circumstance without too many roots , you may reuse it . For exemplar , you could save it to occupy in golf hole in your yard , present it to a gardening protagonist , or donate it to a community of interests garden .
3. Remove the Boards
Your raised bed should now face like a big empty box . It ’s now clip to take apart it ! The sides of wooden raised beds are often held in topographic point by wooden stick baffle vertically into the priming coat . If your raise bed has these pin , use your crowbar to loose them enough so you may pull them out of the primer coat .
After all of the wooden pins have been removed , it ’s sentence to take aside the box . Determine if it ’s held in place by nails or screws , and then use either the back of a hammer or a screwdriver to take out them .
If the panel are in honorable term , you could save them to reprocess for another undertaking . Otherwise , you could append them to your compost or burn pile .

If your raised bottom is made from a different material , such as alloy , your dismantle subprogram is a little minute dissimilar . For a metal put up seam , try pry it aside at the joins with your crowbar . If this does n’t make , use metal shear to cut the sides assailable . Just be very measured , as the raw metal edges will be very precipitous !
4. Amend The Soil
Now , all you ’ll have left is a large , empty rectangle of soil . agitate up the dirt with your pitchfork , and then use the digger to become it over . When you ’re finished , you should have loose soil at least 6 column inch deep . At this point , you have the choice to screen your stain ’s pH levels . Doing this is a salutary idea if you ’re plan to expend the space for novel plants . That way , you could meliorate the territory based on your plant ’s motive .
Luster Leaf ’s Rapitest Soil Test Kit is a peachy alternative for getting a quick , accurate reading .
penetrate here to see more on Amazon .

instead , you could adjudicate SONKIR ’s pick - way Moisture / Light / pH Tester .
Now , spread at least 2 to 3 inches of compost evenly over the soil . No matter your grease ’s pH level , compostis an incredible way to add nutrient to your garden . Work it equally through the loose grunge . You could also consider total perlite at this degree if your grime need extra drain .
last , add fertiliser . 5 - 10 - 10 is a good standard for world-wide soil and planting motive . Otherwise , you’re able to select fertilizer based on the results of your soil pH test and the need of the plants you ’d like to arise .

see out our articleCan You spit Fertilizer On Top Of Soil?to learn more about the specifics of plant food and its uses .
5. Plant The Space
Last of all , you ’ll want to add together plants to the space formerly invade by your raise bed . If you ’d like to modify it into a traditional garden seam , survey the function for set whatever you ’re design to grow . Typically , this means plant in fountain or in early capitulation if you ’re plant bulbs .
However , if you ’re design to fuse the former garden bed into the rest of your cubic yard , you ’ll want to plant it with grass . If you ’re using one of the democratic cool - time of year turfgrass varieties , you ’ll need to plant in the nightfall . Warm - season varieties , on the other handwriting , should be planted in bound .
Our articleHow Long After Tilling Can You Lay Sod Or Plant Grass?gives detailed directions on how to constitute sens , so go over it out if you call for more information .

If you need to have your former elevate bed site ease for a few month before imbed , it ’s a good idea to plow it with a tarp or charge card sheet . That way , stray seed wo n’t arise and your lawn wo n’t crawl into the space .
What Is The Best Season To Remove Raised Garden Beds?
Unless the ground is stock-still , you could get rid of a raised bed in any season . However , your good bets are early spring right on after the last Robert Frost or late summer just before the time of year changes . It all depends on how you plan to use the distance .
For example , if you absent the bed in other spring , you ’ll be able-bodied to straight off plant with either unexampled garden selections or ardent - season turfgrass . On the other hand , if you remove the bed in late summertime , it pay you enough prison term to rectify the soil before planting it with cool - season turfgrass or bulbs .
In Closing
Although multitude often think that raised bed are a lasting garden feature article , they can in reality be removed with minimal difficulty . Whatever your reason for move out the seam , just observe the step we sketch above .
We go for that this template help you hit your unneeded raised seam and transform your garden into a more beautiful , utilitarian infinite .


